Before smartphones came into being, taking great photos was considered labor-intensive. You would have to purchase a fancy camera, expensive editing softwares, and invest some serious time and energy into learning how to use them.
In 2007, Apple released its first iPhone with a 2-megapixel camera that brought photography to the hands of everyone. Fast forward to 2020, many advanced releases like the iPhone 11 Pro, have made it easier to capture high-quality photos and edit them, all from the same device that was only meant to connect people.
But what exactly is the key to taking incredible photos on an iPhone? While some people may work years and years to master their photography skills, all you need are some simple tips and an eye for detail.
In this article, we’ll share information on how to take good photos with your iPhone.
Tips for taking good photos
Keeping photos simple
Among all the things you need to do to take good photos with an iPhone is keeping them simple. Avoid including too many details. Too many details distract viewers and make it hard to create beautiful compositions. Instead of using multiple objects, include a single subject. This will make it relatively easier to create a strong composition.
Check the scene for any distracting elements when preparing for the shot. Try to change your viewpoint so these unwanted objects are removed. Minimalist compositions are among the most powerful ways you can create eye-catching photos. It’s natural for you to worry about the empty space or the negative space as we call it, but it’s a great way you can differentiate the subject.
Your photo will stand out if it is clean and simple.
Shooting from a low angle
The most convenient way to take photos on a mobile device is by clicking from chest height. However, there are some more creative options as well.
Learning how to capture great photos requires thinking out of the box. One such way to improve your photos is shooting from a lower angle. There are three very good reasons to click pictures this way.

One, it makes the picture intriguing and shows the world from a different perspective.
Two, shooting from a lower angle helps remove unwanted objects from the background thus making your subject stand out against a plain background.
Three, it allows you to show interesting details in the image foreground. For example, while shooting landscapes, try to shoot at a lower angle to capture the grass and flowers, or if shooting near a water body, you can capture ripples and reflections in the water.
Shooting photos with depth
Photos that convey a sense of depth look much better than those which don’t. Creating depth makes your photos engaging and helps capture viewer attention.
You can create depth by capturing landscapes with leading lines in the composition. Roads, railway tracks, rivers, fences, etc. make for excellent leading lines. If you are at the beach, use the sand ripples as the leading lines in your composition.

Make sure to compose your photo such that the lines lead from the foreground into the distance. This leads the viewer through the scene and makes your photo more appealing.
Another way you can create depth is by including some objects in the foreground like rocks, and flowers, etc.
If you struggle to locate such objects, prefer shooting from a lower angle, and including objects in the foreground, middle-ground, and the background. Doing this will help make your image look more three dimensional thus adding more sense of depth to it.
Capturing Close up details
One of the most amazing things to experiment with photography is getting close to the subject. This is important if you want to photograph objects with details. Shooting close up allows you to capture the minute details like patterns, textures, and colors that bring your photos to life.
You can try shooting flowers, dissected vegetables, dry leaves, water droplets, and other textured surfaces that look more exciting up close.

Taking close up shots is a popular technique in portrait photography. They work perfectly when photographing people and pets. Letting you capture the facial features in detail and display emotions in a better way, close up shots create far more impact than normal pictures.
If you are looking to get close to your subject with your iPhone camera, you may not be able to focus on it if the lens is too close. In such cases, you can use add-on camera attachments like Macro lenses that allow phone cameras to focus close to the subject.
If you are shooting landscapes, it won’t be a bad idea to include little close-up details in the foreground. Capture those details and you’ll find your photos visually interesting with a sense of depth as well.
Capturing silhouettes
Silhouette is the dark shape of an object captured against bright light and create a stunning composition to catch viewer attention. To shoot a silhouette with your iPhone, all you need to do is find an interesting subject and then shoot towards the light source.
Make sure the silhouette you capture appears dark. For this, you would need to darken the exposure in your camera app. If you wish to darken the silhouettes further, you can use editing softwares like Picasa or Photoshop later on.
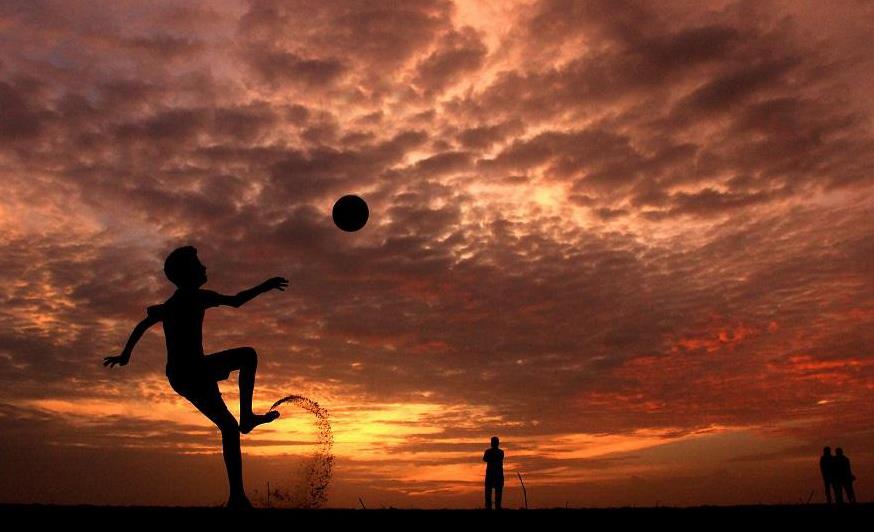
Silhouettes are the best when captured during the golden hours of sunrise and sunset. With the sun low on the horizon, it becomes easier to position the light behind the subject, plus you get to have the beautiful shade of the sky as the background.
You can also use other light sources to create silhouettes. For example, using white lights behind a subject that you want to include in your composition.
Using the Self-Timer on your iPhone
While you may be taking all sorts of pictures of different subjects, you can always try clicking self-portraits. If you are wondering how to do this, the secret lies in using the self-timer feature in your iPhone Camera app.
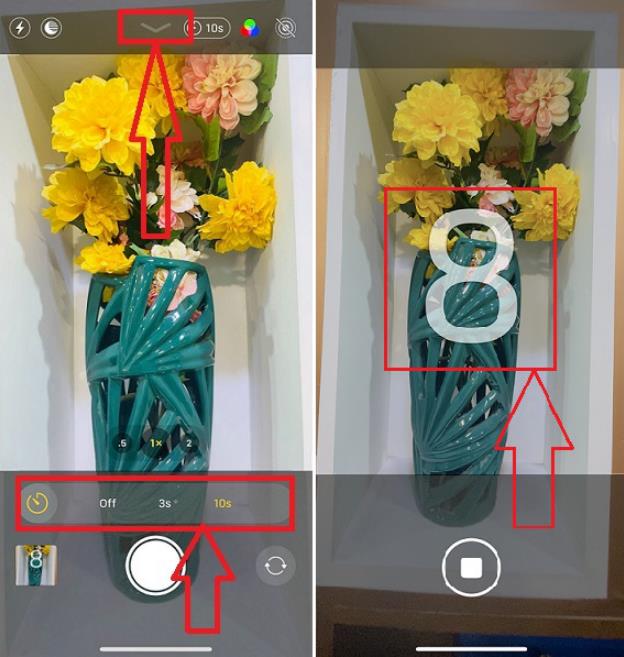
Choose a composition as simple or as minimalistic as possible and you’ll definitely come up with great portraits of yourself. To use the Self-Timer on your iPhone, follow the steps:
- Open the Camera app on your iPhone.
- On the menu bar at the top, click on the arrow sign and then select the duration for which you want the timer to run.
- Simply click on the shoot button and the timer will start to run.
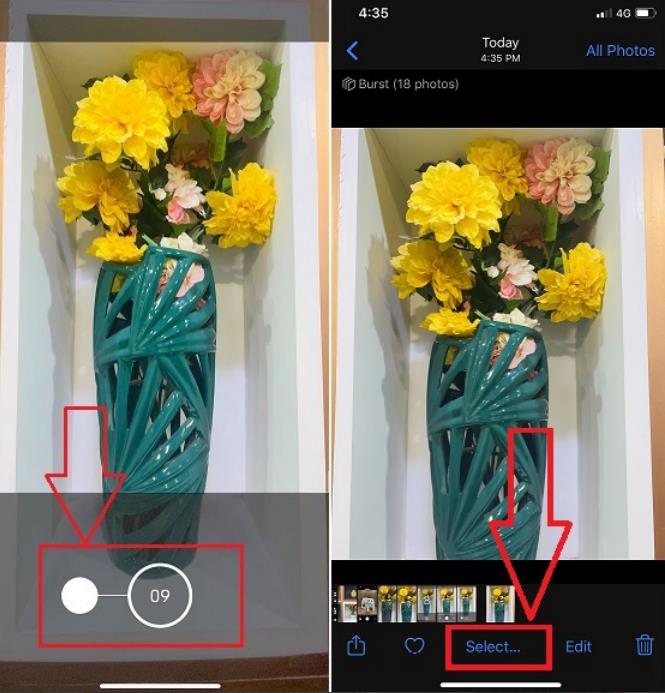
Using the Burst Mode
Burst Mode in your iPhone comes handy if you want to shoot something with accuracy that is moving too fast. If you are looking to use the Burst Mode in your iPhone, swipe left on the shutter button and hold to shoot.
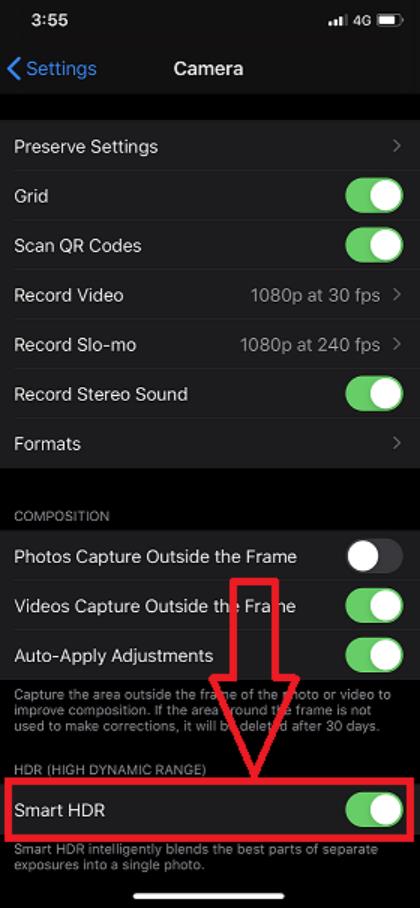
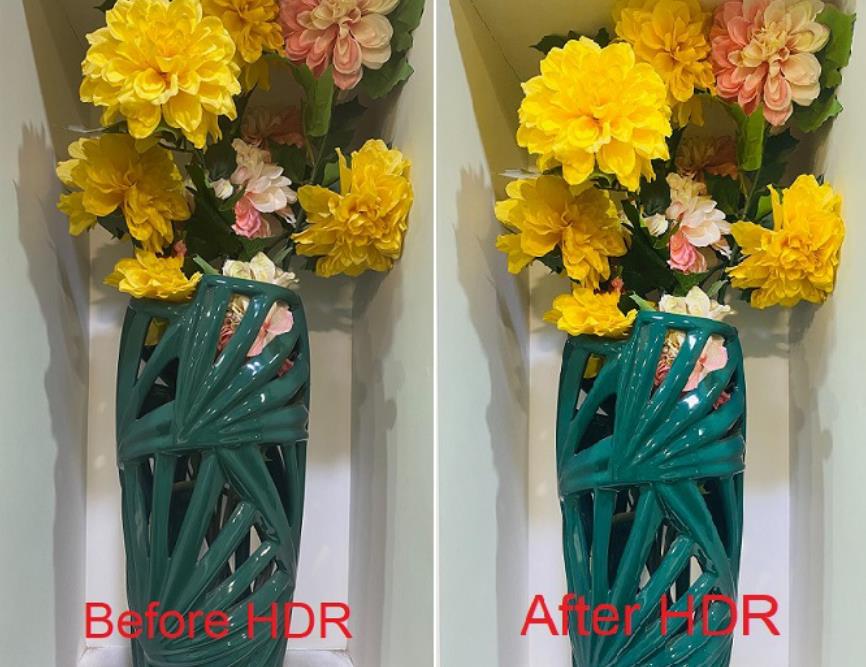
Using the HDR Mode
HDR expands to High Dynamic Range. This mode works to create perfectly lit photos with rich colors and detail in bright as well as dark areas. To use the HDR mode on your iPhone, follow the steps:
- Open device settings.
- Go to Camera and tap on the toggle button next to the Smart HDR tab in the HDR section so it is ON.
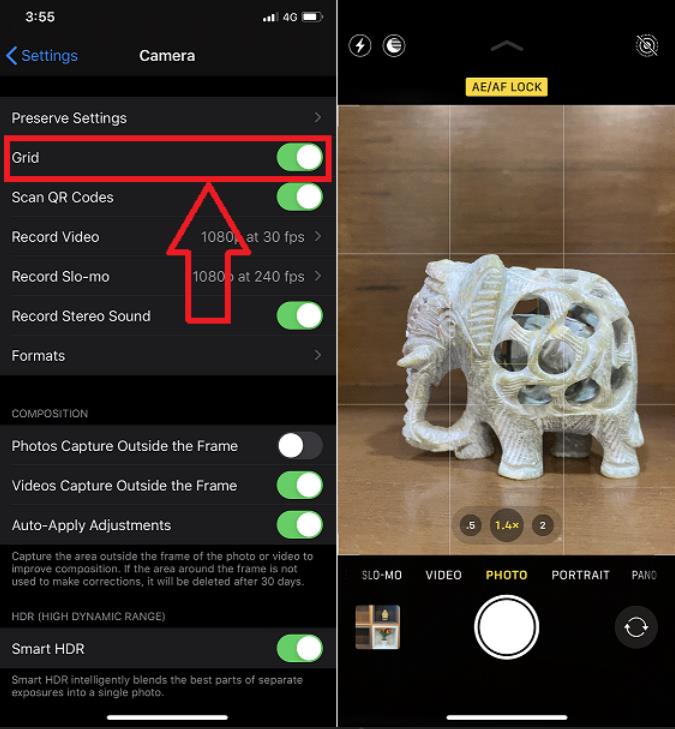
Using the Grid
Using the Grid allows amateur photographers to follow the rule of thirds, enabling them to click photos that look interesting. To enable the Grid feature in your iPhone camera follow the steps:
- Open device settings.
- Go to Camera and tap on the toggle button next to the Grid tab so it is ON.
iPhone Camera Shaking Issue
While you are ready to venture out on the journey to click beautiful photos, the camera shaking issues in your iPhone can take your time and patience away from doing photography. Here’s how you can alleviate the same:
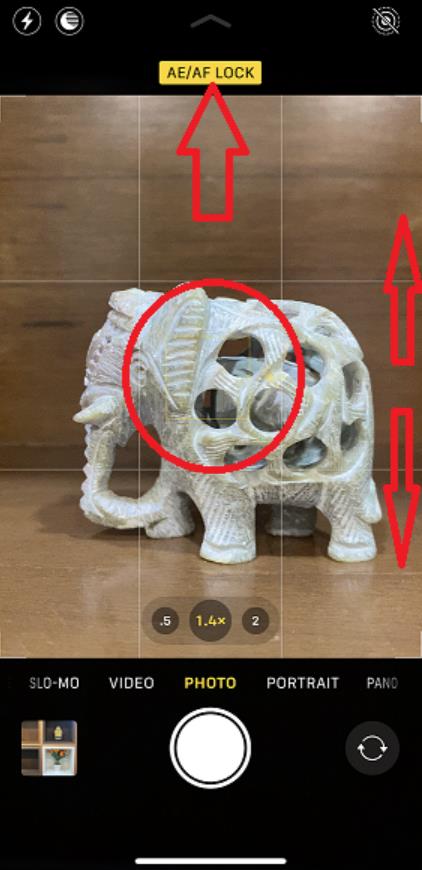
Take out your iPhone from the case if any. Clean the rear camera lens to remove any accumulated dirt that might be causing the shaking effect. If doing this doesn’t work, you can restart the camera app. Another thing to try when looking to pacify the shaking effect is locking the focus on your subject. To lock the focus on your subject, follow the steps:
- Open the Camera App.
- Focus your camera on the subject that you want to capture.
- Long press on the screen where the subject is visible until a message saying AE/AF Lock appears on the screen.
If locking the camera focus doesn’t help, try restarting your iPhone.
The final word
The photography tips discussed in the article will improve your photography skills and help you take better photos with your iPhone. Though there is some equipment and editing softwares that can be used to add special effects, images will turn out beautiful if they are natural and the composition is simple yet engaging.

