


Before the 2017 iPhone X, all previous generations of iPhones had similar means of capturing screenshots. Users only had to press the home and power buttons simultaneously for a short time, and a screenshot was ready. This approach works for later versions of iPhones with home buttons but not the more recent ones, especially the iPhone 13 family.
If you are transitioning from an Android device to an iPhone, you may wonder why things work differently on iPhones. That is because the OS and user interface of an iPhone are markedly different from Androids. However, the good news about recent iPhones is that there are plenty of ways to take screenshots and perform other duties.
If you have any iPhone 13 variants, see below some ways you can take screenshots of them.
7 Ways To Take Screenshots on iPhone 13
- The Hardware Approach
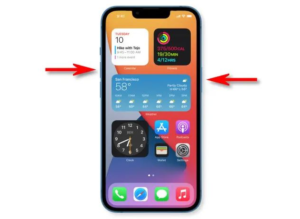
This method involves pressing the power and volume up buttons simultaneously for a few seconds. It immediately captures your current screen and shows you its preview at the screen base. At this stage, you can choose to edit or discard the shot. But if you don’t perform any action after a few seconds, the screenshot automatically saves itself on your iPhone’s Photos App.
Save 25% OFF MagSafe Charger with code: ESRBLOG
The caveat to this approach is that you release the two buttons quickly. If you don’t, you might elicit another response such as Power Off, Emergency SOS than can disable Face ID, and a request for your Medical ID if you’ve set it to that. But if you press both and release within 3 seconds, you can be sure it will take the screenshot ideally.
- Back Tapping
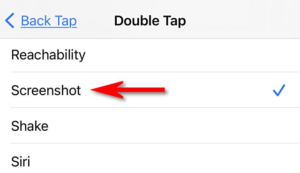
One accessibility feature that Apple enabled on iOS 14 and 15.2 is the Back Tap. This feature allows you to perform some functions by tapping the back of your iPhone twice or three times. You will, however, have to turn it on and “instruct” it to take screenshots once you tap.
To turn this feature on, head straight to Settings and look for Accessibility. Under Accessibility, look for Touch and tap on it. It will bring out the Back Tap option, and you can decide how many times after tap it should screenshot. Once these settings are in place, you only need to tap your iPhone 13 gently at the back, and it already knows what to do.
- Screenshot With Siri
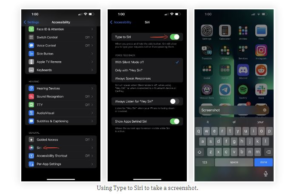
iPhones have a virtual assistant called Siri. This assistant is akin to Google’s Voice Assistant on Android devices. It enables you to communicate your intention verbally while it gets executed. Excellent as it may sound, you must set it up before it can serve you.
To set up Siri so it can screenshot, proceed to Settings and search for Siri. Once you find it, select Listen for “Hey Siri,” and set up your voice. Once it identifies and saves your voice, you can say, “Hey Siri, take a screenshot,” and it will. This method is best for someone driving with no time for hardware screenshotting.
- Screenshot With Shortcuts
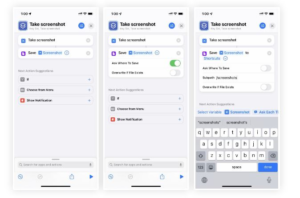
iOS 14.5 and above supports a shortcut app that allows users to create a shortcut for their most common actions on iPhone 13. So, you can create a shortcut for screenshotting by tapping the “+” sign on the My Shortcut app and starting a new workflow. Scroll down to see the “Take Screenshot” option and select it. Once done with this action, select “Save to Photo Album” so the screenshot gets saved to your phone once taken.
If you don’t want anyone to know what this shortcut does, you can name it something else. Whatever name you choose, this is what you’d tell Siri, and the virtual assistant already understands the message.
- Voice Control Also Works!
Just like Apple’s Siri, Voice Control also allows you to speak to your iPhone 13, and it will take a screenshot. You will, however, have to switch it on because it’s always off. Once on, a blue speaker-like icon will show beside your status bar clock.
You can switch this feature on by going to settings and reaching out to the Accessibility option. With the speakerphone on, you can “command” your iPhone 13 to take a screenshot, and it will. It’s such a hands-free, convenient means to get a screenshot.
- Screen Mirroring
This method of capturing your iPhone 13 screen is only possible if you have a MacBook. The reason is that it relies on the ability of the Mac to mirror the screen of your iPhone 13. Head straight to the control center of your iPhone 13 and enable the mirroring function. With this function activated, your iPhone will suggest connecting or pairing it with your computer.
Once you pair, you can access your iPhone 13’s screen on your Mac, and from there, you can capture it. The advantage of this screenshotting approach is that you can get broader coverage than others. However, you should expect the edges to be dark and not as smooth as other methods. But that should not be an issue since you can always crop the unwanted part.
- Screenshot With QuickTime Player
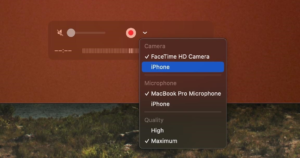
If you’re familiar with QuickTime Player, you may be wondering how it’s a good fit for iPhone 13 screenshots. Yes, it is! However, you will have to connect your Mac and iPhone 13 via a cable to use this method. Your iPhone will prompt you to “trust” the computer and unlock its accessories. Once you accede to these, it’s time to launch the QuickTime Player on your macOS.
Select “New Movie Recording” on your Mac and choose your iPhone from the list. Once you take the screenshot, you can determine where to save it on your system.
How About A Scrolling Screenshot On iPhone 13?
Yes, it is possible to take a screenshot of a long article you are reading on your browser and convert it into a scrolling PDF. It would help to take a screenshot of the page using the first method described in this article or any other of your choice.
Before the screenshot disappears from the lower-left corner of your iPhone 13, click on it, and it will prompt you to select the page alone or the full article. Choose the complete article and use the crop tool to remove aspects of the article that you don’t want.
Toggle on “Done” once you’re done and save a copy as a PDF. You can go to where you saved it on your phone and read it as a PDF.
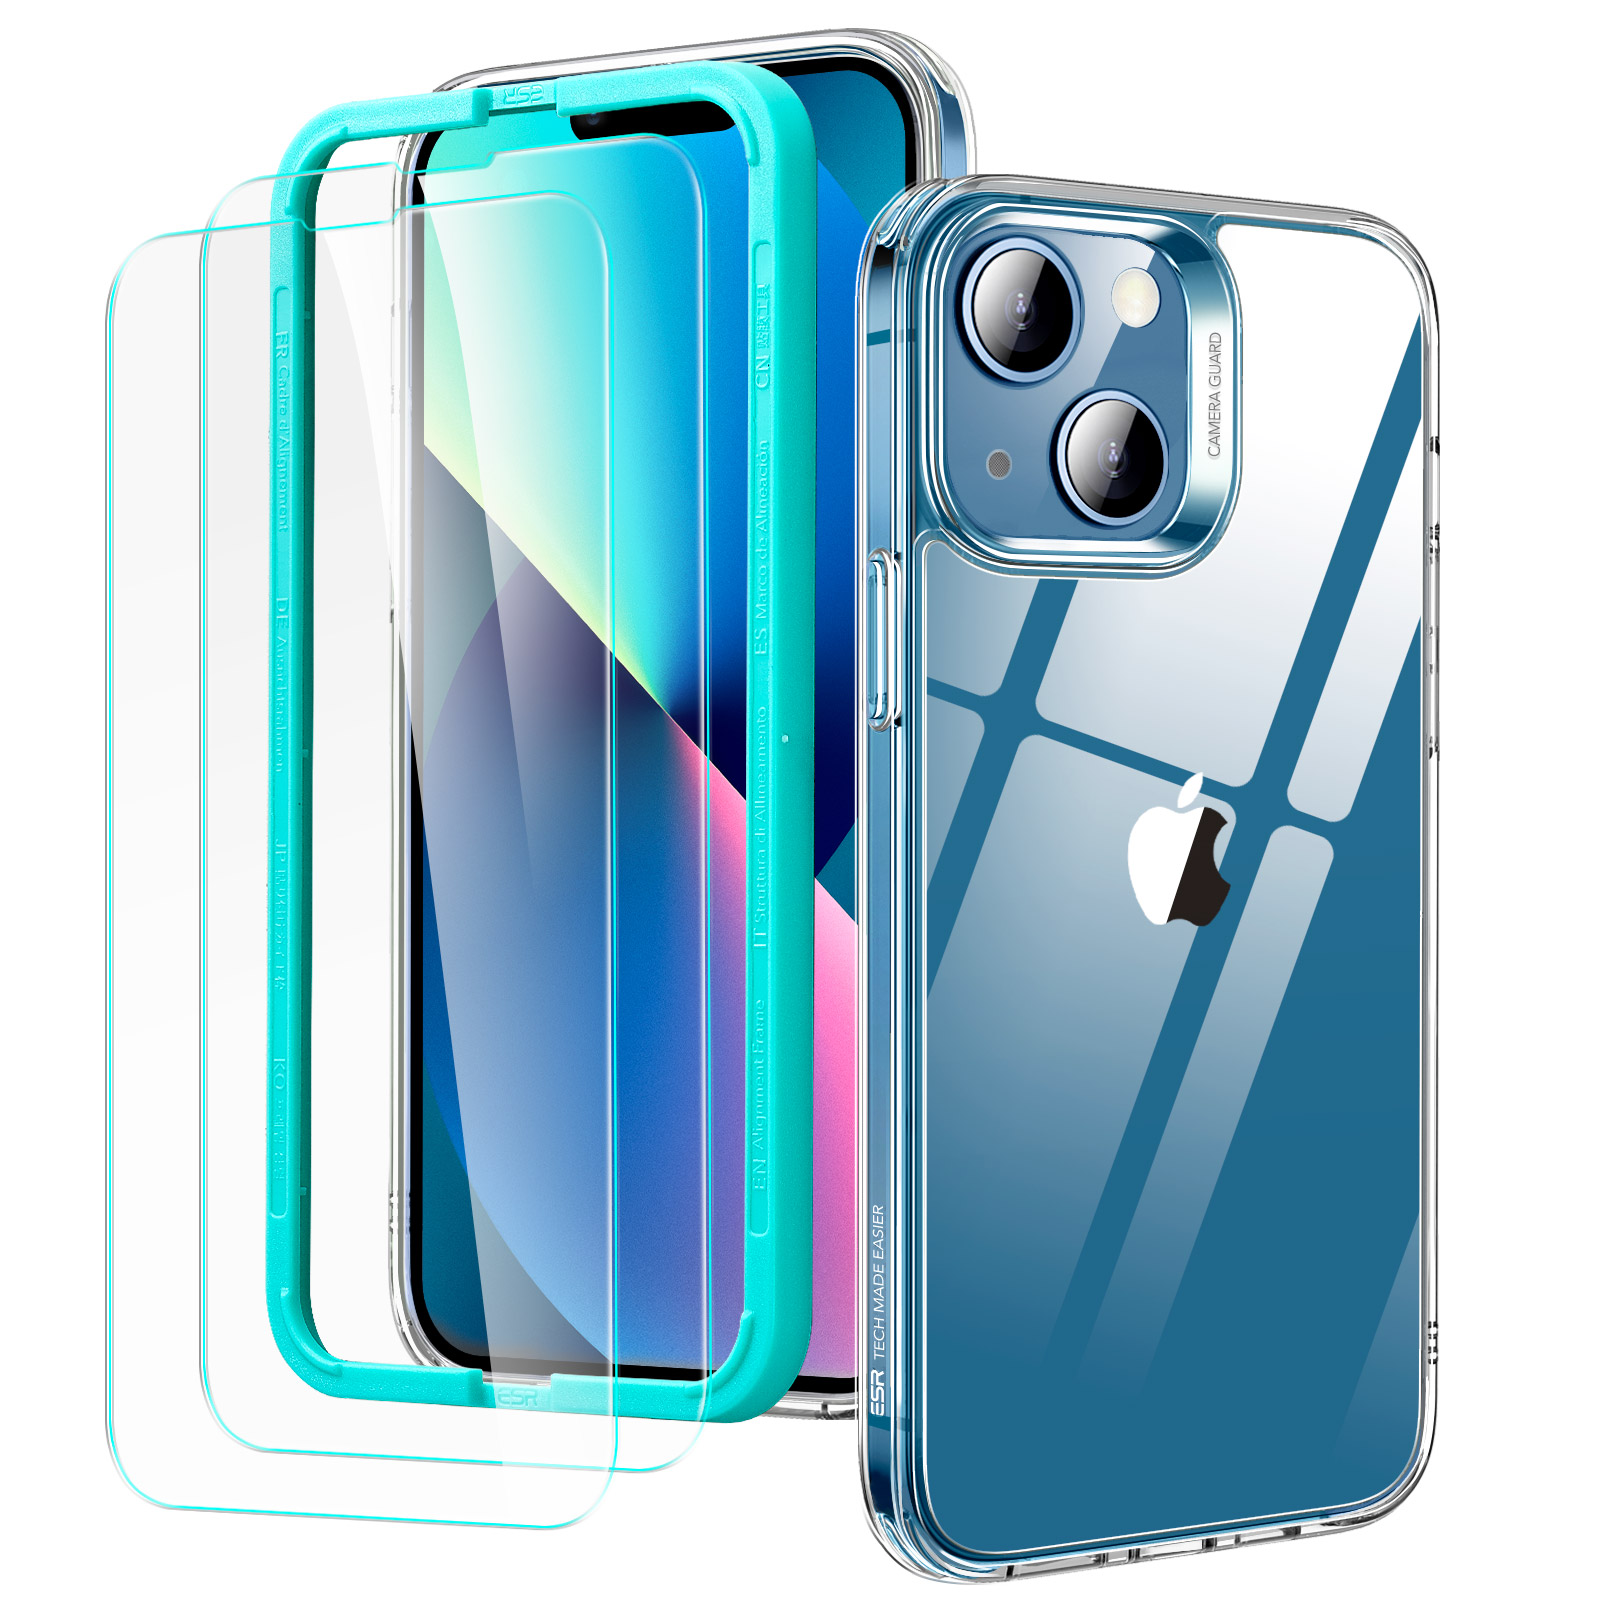
Save 50% OFF iPhone 13 Series with code: SAVE50


Wrapping Up
The possibility of capturing your iPhone 13’s screen is undoubtedly exciting. And as you can see, the process is relatively straightforward, particularly with the Voice Control and “Hey Siri” routes. Unless you have the luxury of time, the Mac approach may not be something you want to try. That said, I hope this article effectively answers your question.
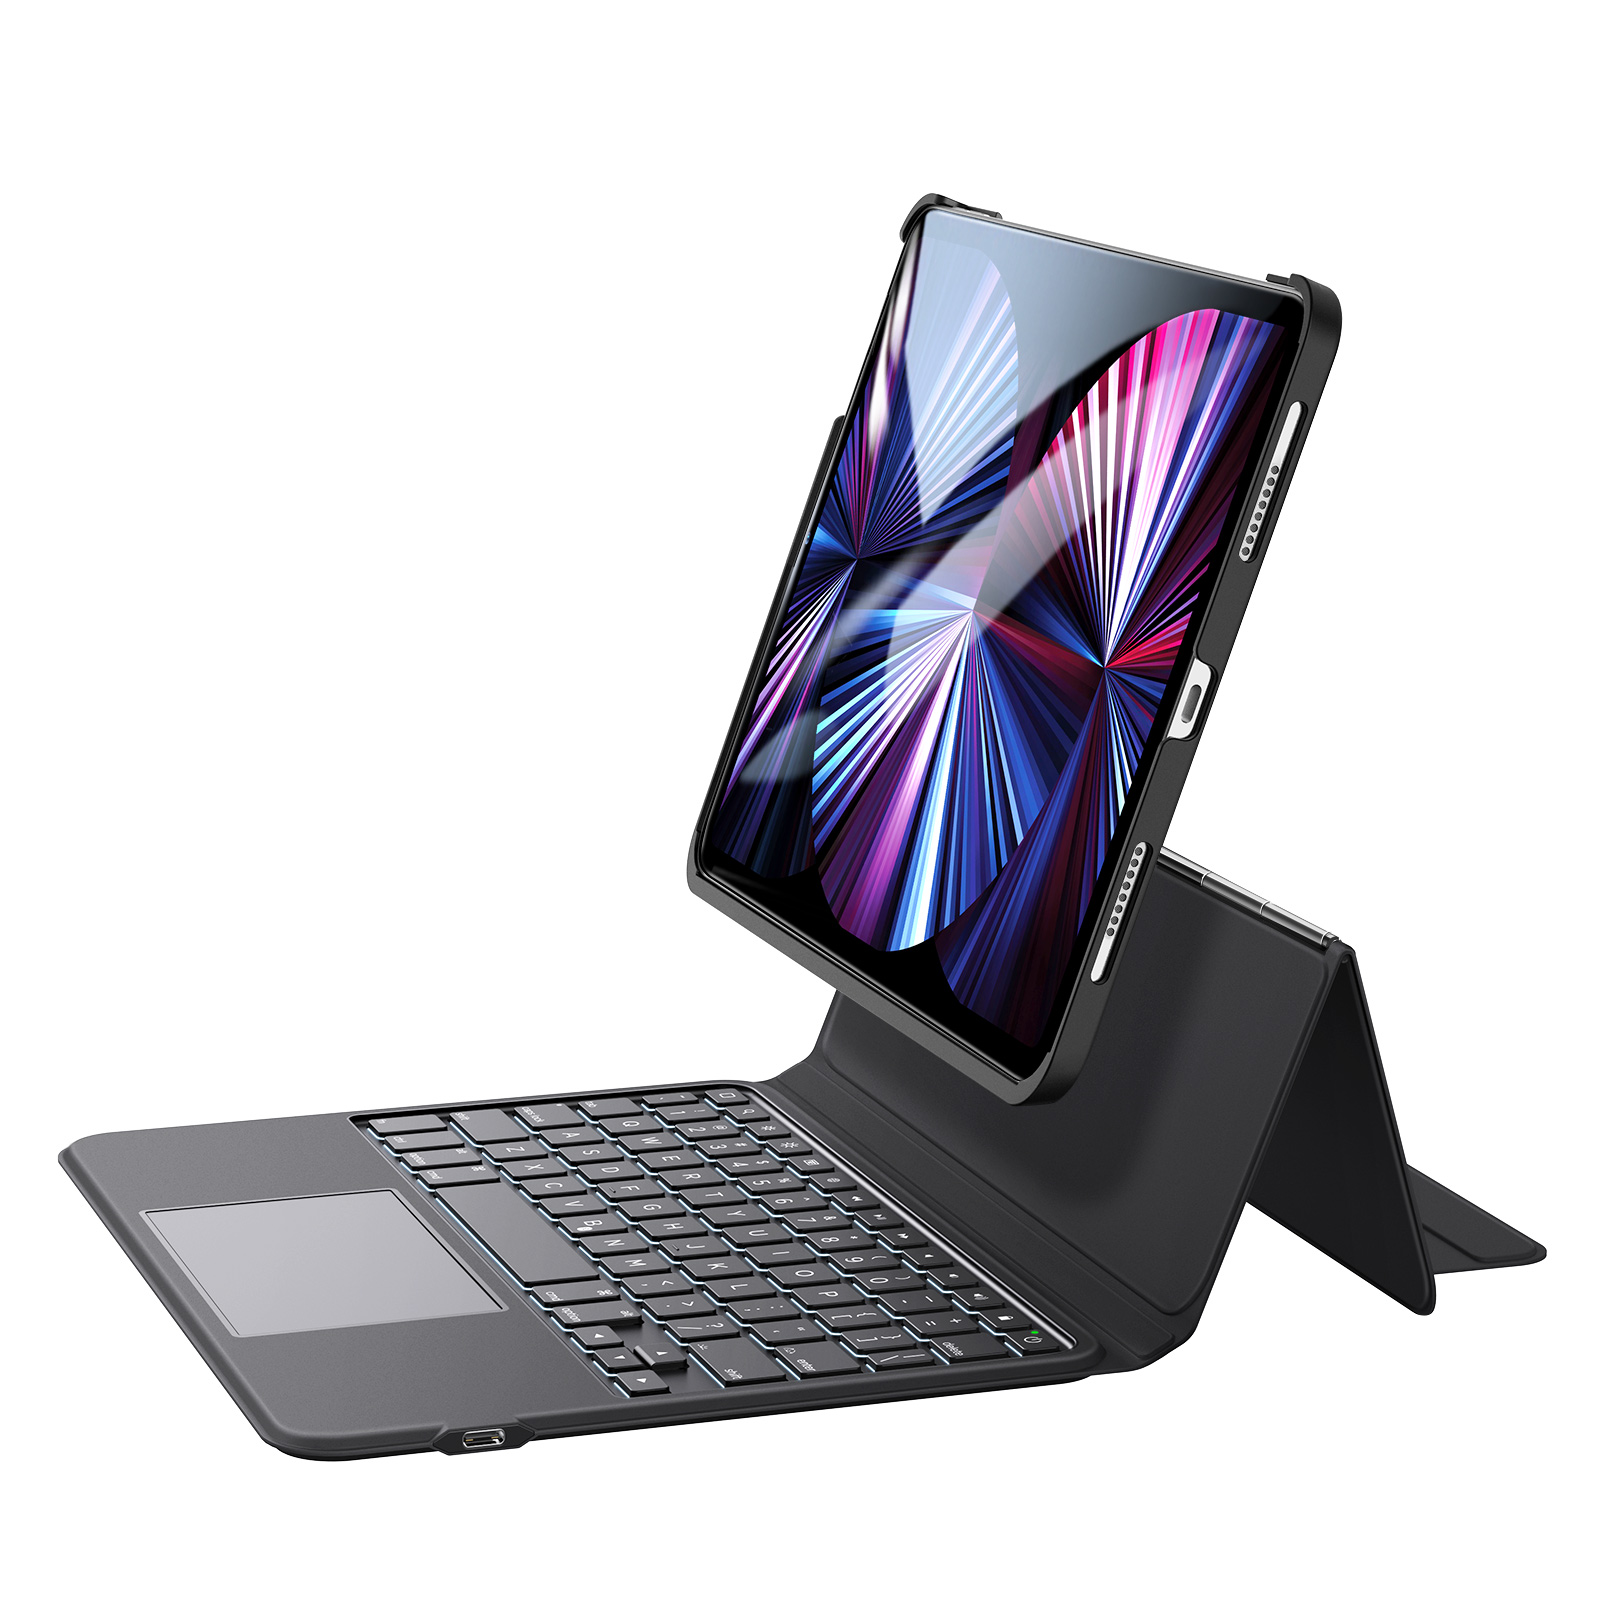
Save 30% OFF iPad Keyboard Case with code: KEY30

 Cases Fit iPad Air 6 (2024)?")
 Cases Fit iPad Air 12.9?")
